Easy Homemade Biscoff Truffles
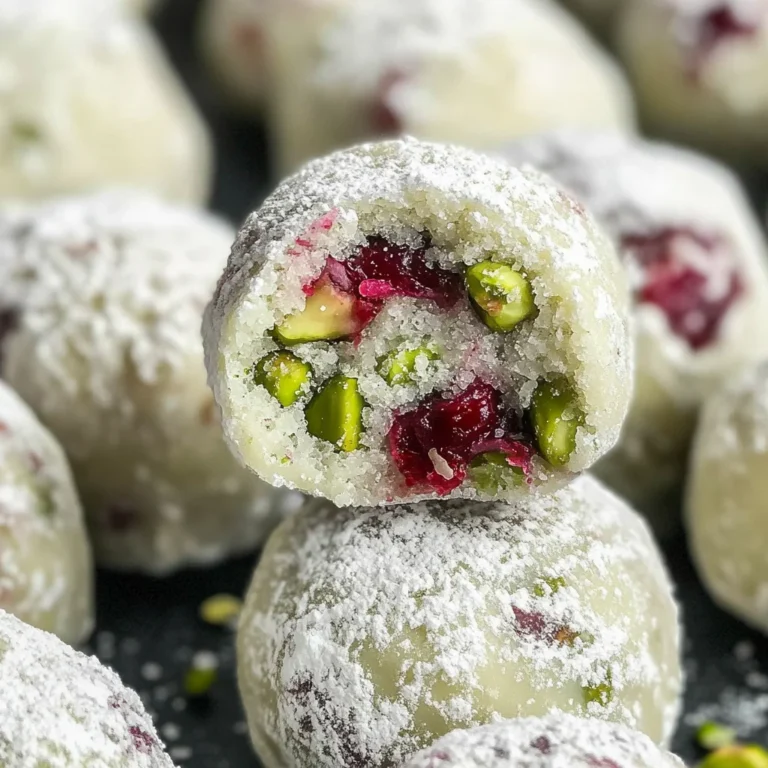
Easy Homemade Biscoff Truffles are the perfect sweet treat for any occasion. These delightful truffles combine the unique flavor of Biscoff cookies with creamy goodness, making them irresistibly delicious. Whether for a party, holiday gift, or just a special dessert at home, these truffles will impress everyone with their rich taste and simple preparation.
Why You’ll Love This Recipe
- Quick and Easy: These truffles come together in just 15 minutes of prep time, making them a fast option for satisfying your sweet tooth.
- Rich Flavor: The combination of Biscoff cookie crumbs and cream cheese creates a wonderfully rich and flavorful truffle that melts in your mouth.
- Customizable: Feel free to add your favorite toppings or mix-ins to personalize your truffles according to your taste preferences.
- No Baking Required: Avoid the oven! This recipe requires no baking, making it perfect for warm days or when you want to save time.
- Great for Gifting: Pack these truffles into a decorative box for an impressive homemade gift that friends and family will love.
Tools and Preparation
Before diving into making these Easy Homemade Biscoff Truffles, gather all necessary tools. Having everything ready will streamline your process.
Essential Tools and Equipment
- Mixing bowl
- Parchment paper
- Microwave-safe bowl
- Spoon or spatula
Importance of Each Tool
- Mixing bowl: Essential for combining ingredients smoothly without any mess.
- Parchment paper: Keeps your baking sheet clean and prevents the truffles from sticking.
- Microwave-safe bowl: Perfect for melting chocolate quickly and evenly without burning it.

Ingredients
For the Truffle Mixture
- Biscoff cookie crumbs
- Cream cheese
- Vanilla extract
- Powdered sugar
For Coating
- Chocolate chips
- Cocoa powder
How to Make Easy Homemade Biscoff Truffles
Step 1: Mix Ingredients
In a bowl, combine Biscoff cookie crumbs, softened cream cheese, vanilla extract, and powdered sugar. Blend until everything is well mixed.
Step 2: Shape Truffles
Roll the mixture into small balls, about 1 tablespoon each. Place them on a parchment-lined baking sheet to prepare for chilling.
Step 3: Chill
Refrigerate the truffles for about 30 minutes. This helps them firm up before coating in chocolate.
Step 4: Melt Chocolate
In a microwave-safe bowl, melt the chocolate chips. Stir until smooth and free of lumps.
Step 5: Coat Truffles
Dip each chilled truffle into the melted chocolate. Allow any excess chocolate to drip off before placing them back on the baking sheet.
Step 6: Dust
Before the chocolate sets, dust each truffle with either cocoa powder or crushed Biscoff cookies for added flavor and decoration.
Step 7: Set
Let the truffles cool at room temperature or refrigerate until the chocolate hardens completely.
Enjoy your delicious Easy Homemade Biscoff Truffles! They are sure to be a hit among friends and family alike.
How to Serve Easy Homemade Biscoff Truffles
These Easy Homemade Biscoff Truffles are a delightful treat that can be enjoyed in various ways. Whether for a special occasion or just a sweet snack, here are some serving suggestions.
With Coffee
- Enjoy these truffles alongside your favorite cup of coffee. The rich flavors complement each other perfectly.
As Dessert Bites
- Serve the truffles on a decorative plate as bite-sized desserts at gatherings. They make an impressive addition to any dessert table.
Gift-Wrapped
- Package the truffles in cute boxes or jars as gifts. Add a personal touch with a handwritten note for a thoughtful present.
With Fresh Fruit
- Pair the truffles with fresh strawberries or raspberries. The contrast of textures and flavors enhances the overall experience.
On Ice Cream
- Crumble the truffles over vanilla or chocolate ice cream for a decadent topping. This adds an extra layer of flavor and texture to your dessert.
How to Perfect Easy Homemade Biscoff Truffles
To achieve the best results with your Easy Homemade Biscoff Truffles, consider these helpful tips.
- Use room temperature cream cheese: This ensures smooth mixing and helps avoid lumps in your truffle mixture.
- Chill before coating: Chilling the rolled truffles makes them firmer and easier to dip in melted chocolate without losing their shape.
- Choose high-quality chocolate: Using good-quality chocolate chips will enhance the flavor and texture of your truffles.
- Experiment with toppings: Try adding different toppings like crushed nuts or sprinkles for added crunch and color.
- Store properly: Keep your truffles in an airtight container in the refrigerator to maintain freshness and prevent them from becoming too soft.
Best Side Dishes for Easy Homemade Biscoff Truffles
If you’re looking for side dishes to accompany your Easy Homemade Biscoff Truffles, here are some delicious options that pair well.
- Fruit Salad: A refreshing mix of seasonal fruits balances the sweetness of the truffles.
- Cheese Platter: A selection of cheeses can provide a savory contrast to the sweet truffles.
- Nut Mix: A variety of roasted nuts adds crunch and complements the creamy texture of the truffles.
- Yogurt Parfait: Layer yogurt with granola and berries for a light, healthy option alongside your sweet treats.
- Chocolate-Covered Strawberries: Enhance the indulgence with more chocolate flavors that pair beautifully with Biscoff.
- Mini Pastries: Offer an assortment of mini pastries for guests who enjoy variety alongside their sweet bites.
Common Mistakes to Avoid
When making Easy Homemade Biscoff Truffles, there are a few common pitfalls to be aware of.
- Using Too Much Liquid: Adding too much cream cheese or vanilla extract can make the mixture too wet. Start with the recommended amounts and adjust gradually if needed.
- Not Chilling Enough: Skipping the chilling step can result in truffles that are too soft to handle. Be sure to refrigerate them for at least 30 minutes before dipping in chocolate.
- Overheating Chocolate: Melting chocolate chips too quickly can lead to a burnt or grainy texture. Use low power settings when microwaving and stir frequently until smooth.
- Skipping Dusting: Forgetting to dust the truffles before the chocolate sets means missing out on extra flavor. Use cocoa powder or crushed Biscoff cookies for a delicious finish.
- Not Using Parchment Paper: Placing truffles directly on a baking sheet can cause them to stick. Always line your baking sheet with parchment paper for easy removal.

Storage & Reheating Instructions
Refrigerator Storage
- Store truffles in an airtight container.
- They will last for up to 5 days in the refrigerator.
Freezing Easy Homemade Biscoff Truffles
- Place truffles in a single layer on a baking sheet and freeze until solid.
- Transfer them to an airtight container or freezer bag for up to 3 months.
Reheating Easy Homemade Biscoff Truffles
- Oven: Preheat oven to 300°F (150°C). Warm truffles for about 5-10 minutes.
- Microwave: Heat individually on low power for about 15 seconds, checking frequently.
- Stovetop: Use a double boiler method, warming gently while stirring.
Frequently Asked Questions
Here are some common questions about making Easy Homemade Biscoff Truffles.
Can I use other types of cookies?
Yes, you can experiment with different cookie flavors for unique truffle variations!
How do I make these truffles vegan?
Substitute cream cheese with a plant-based alternative and ensure your chocolate is dairy-free.
What kind of chocolate works best?
Dark or milk chocolate chips work well. Choose based on your preference for sweetness!
Can I customize the toppings?
Absolutely! Feel free to add nuts, sprinkles, or coconut flakes for added texture and flavor.
Final Thoughts
Easy Homemade Biscoff Truffles are not only simple to make but also incredibly delicious. They make perfect treats for any occasion and can easily be customized with your favorite flavors or toppings. Give this recipe a try and enjoy delightful bites of cookie goodness!
Easy Homemade Biscoff Truffles

Indulge in the delightful world of Easy Homemade Biscoff Truffles, a no-bake treat that combines the unique flavor of Biscoff cookies with creamy goodness. Perfect for any occasion, these truffles are not only simple to make but also impressively rich and flavorful. With just a handful of ingredients and minimal preparation time, you’ll have a sweet treat ready to share or enjoy on your own. Personalize them with your favorite toppings and present them in decorative packaging for an impressive gift. Experience the joy of making these creamy cookie bites that are sure to satisfy your sweet cravings!
- Prep Time: 15 minutes
- Cook Time: 0 minutes
- Total Time: 15 minutes
- Yield: About 16 servings
- Category: Dessert
- Method: No-Bake
- Cuisine: American
Ingredients
- Biscoff cookie crumbs
- Cream cheese
- Vanilla extract
- Powdered sugar
- Chocolate chips
- Cocoa powder
Instructions
- In a mixing bowl, combine Biscoff cookie crumbs, softened cream cheese, vanilla extract, and powdered sugar. Mix until smooth.
- Roll the mixture into small balls (about 1 tablespoon each) and place them on parchment paper-lined baking sheets.
- Refrigerate for 30 minutes to firm up.
- Melt chocolate chips in a microwave-safe bowl until smooth.
- Dip each chilled truffle into the melted chocolate, allowing excess to drip off before returning to the baking sheet.
- Dust with cocoa powder or crushed cookies before the chocolate sets.
- Let cool at room temperature or refrigerate until hardened.
Nutrition
- Serving Size: 1 truffle (25g)
- Calories: 110
- Sugar: 8g
- Sodium: 40mg
- Fat: 7g
- Saturated Fat: 4g
- Unsaturated Fat: 3g
- Trans Fat: 0g
- Carbohydrates: 10g
- Fiber: 0g
- Protein: 2g
- Cholesterol: 15mg